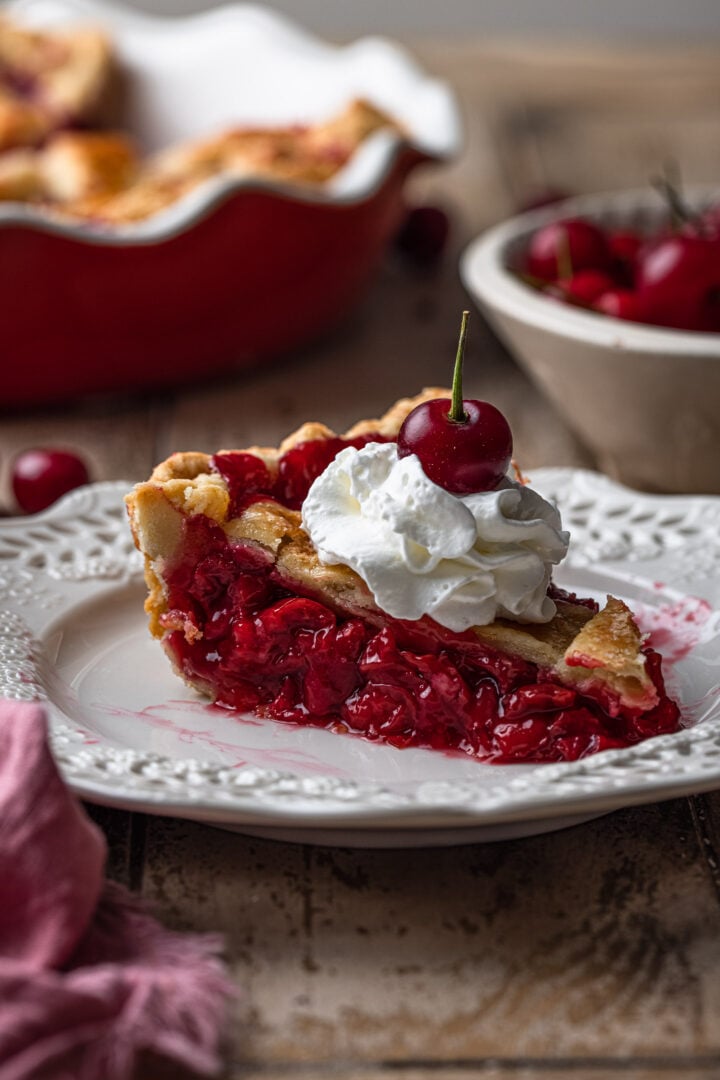
Love pie for dessert? You might also want to check out my American Flag Berry Pie, Passion Fruit Cream Pie, Key Lime Pie and Almond Apple Pie! 😋 Sure, ice cream is a must-have summer treat. But fruit pies really have a special place in my heart! ❤️ Can you think of a better way to end a BBQ or cookout than by presenting a freshly baked cherry pie topped with vanilla ice cream? Oh, I drool just by thinking about it! What’s not to love? A flaky, buttery crust paired with a luscious homemade sweet and tart cherry filling that is not too runny or too thick. Just perfect! I’ve mentioned it in the intro, but it’s worth it mentioning again: you can make this pie even if you can’t find fresh sour cherries. Keep reading and I’ll give you several options, such as using frozen or canned cherries, or even making it with sweet cherries instead! 🍒
Ingredients
To make Sour Cherry Pie, you will need:
Ingredients for the double crust – Your usual suspects for an all-butter crust: flour, butter, sugar, salt and ice water. Plus egg wash to brush the crust so it turns a beautiful golden brown color!Sour Cherries – Fresh is best, but frozen or canned work too. Sweet cherries can also be used, but I would then use some more lemon juice and lower the amount of sugar used so it’s not overpoweringly sweet.SugarLemon juiceVanilla extractAlmond extract – Only a touch! Almond extract adds a very interesting flavor profile, but when used in excess it can ruin everything.Cornstarch – For thickening the homemade cherry pie filling. Butter – I like to dot the filling with a few cubes of butter, for extra richness! You can skip this step if you prefer.
Where can I find sour cherries?
Unfortunately, here in the United States, fresh sour cherries can be difficult to find and are in season for a really short period: from June to July. They also don’t last very long once they are picked, which is why most grocery stores won’t bother selling them, so your best bet would be a farmers market or a pick-your-own farm! (Here in New Jersey, Alstede Farms has them in the summer – both at the farm and at several farmers markets in North Jersey.) Since they are very popular in Iranian cuisine, you could also try Persian and Middle Eastern stores, if you live near one. Once you find these cherries, you will be able to easily distinguish them from their sweet cousins due to their size (smaller) and bright red color. They are also more fragile than the sweet variety, so handle them gently! If you still can’t find tart cherries, just head to the frozen aisle at your grocery store, where you will likely find them in frozen form!
How to Make Cherry Pie
Homemade pies can be quite intimidating, but they don’t have to be! I used to be downright scared of pies. All the chilling and “don’t do this” and “you HAVE to do that” or “your pie will be an absolute disaster”. Gaaaaah! There really is a lot of fear mongering where pies are concerned! The reality? Pies are not that difficult to make. And even when you get them wrong, they are still delicious! Besides, how are you gonna get better if you don’t practice? Yes, making pie from scratch is a bit of a labor of love. You’ll have to wait for the crust to chill, you’ll have to cook the filling (so you don’t end up with a runny pie and/or a soggy bottom) and you will have to wait for the pie to cool before slicing. But that doesn’t mean it’s difficult! Just a bit time consuming. Moral of the story? Bake the damn pie! 😉 Recommended tools and equipment: food processor, cherry pitter (this one is good too!), pie dish, rolling pin, pastry wheel cutter. Here’s how I make this sour cherry pie recipe. As always, you will find the printable (and more complete) version of the recipe at the end of this post!
Step 1: Prepare the crust.
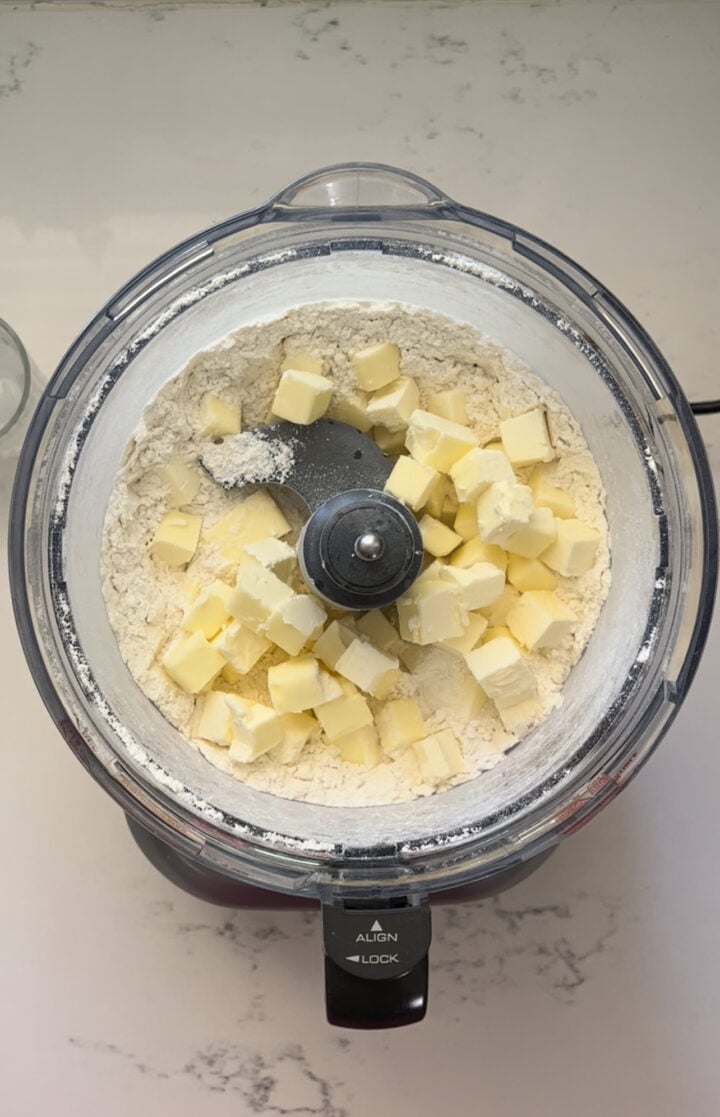
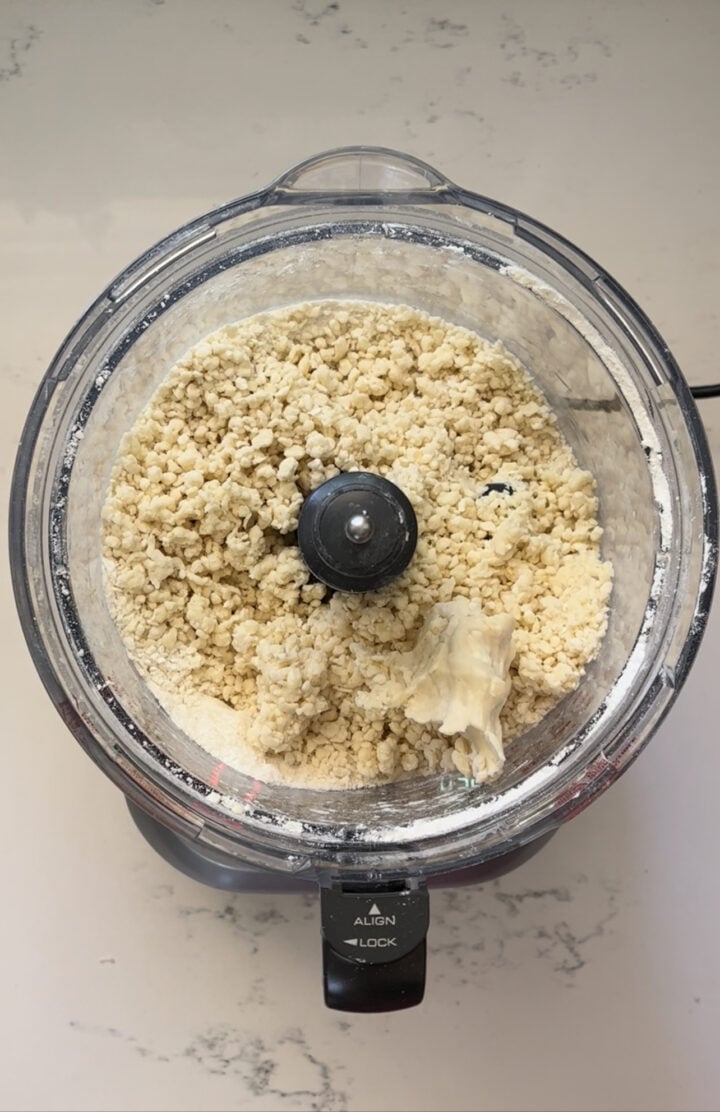
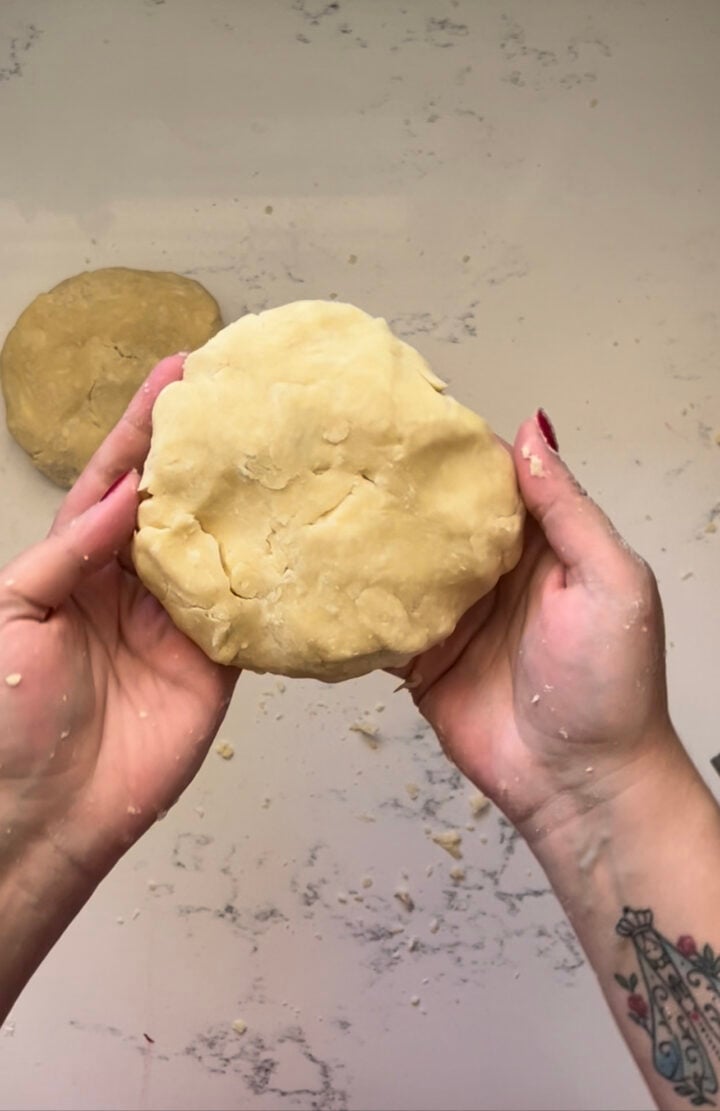
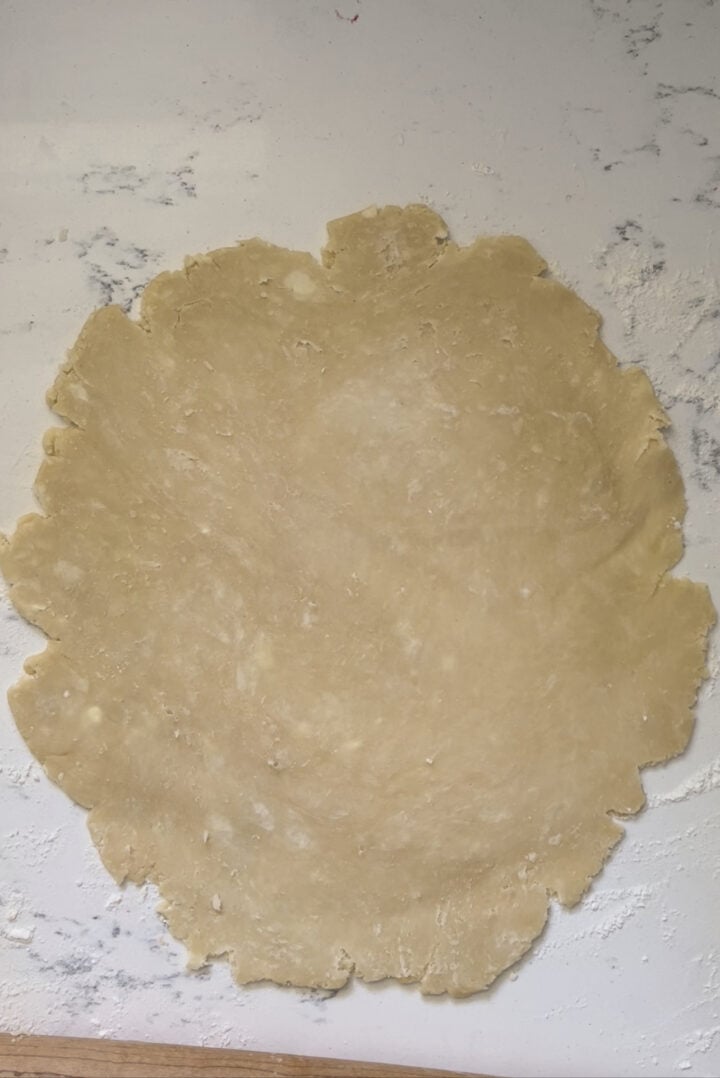
In the food processor, combine the flour, sugar and salt. Pulse a few times to mix.Add the cold butter and pulse to cut the butter into the flour, stopping when the mixture forms pea-size pieces. Slowly drizzle very cold water, a little bit at a time, pulsing until a dough starts coming together. You will see a few large clumps forming and that’s when you should stop adding water.Transfer the dough to a lightly floured surface and, using floured hands, gather it into a large ball. Divide this ball in half and flatten them into disks. Then, cover each disk with plastic wrap and refrigerate for at least one hour (and up to 2 days) before using.
Step 2: Make the cherry pie filling!
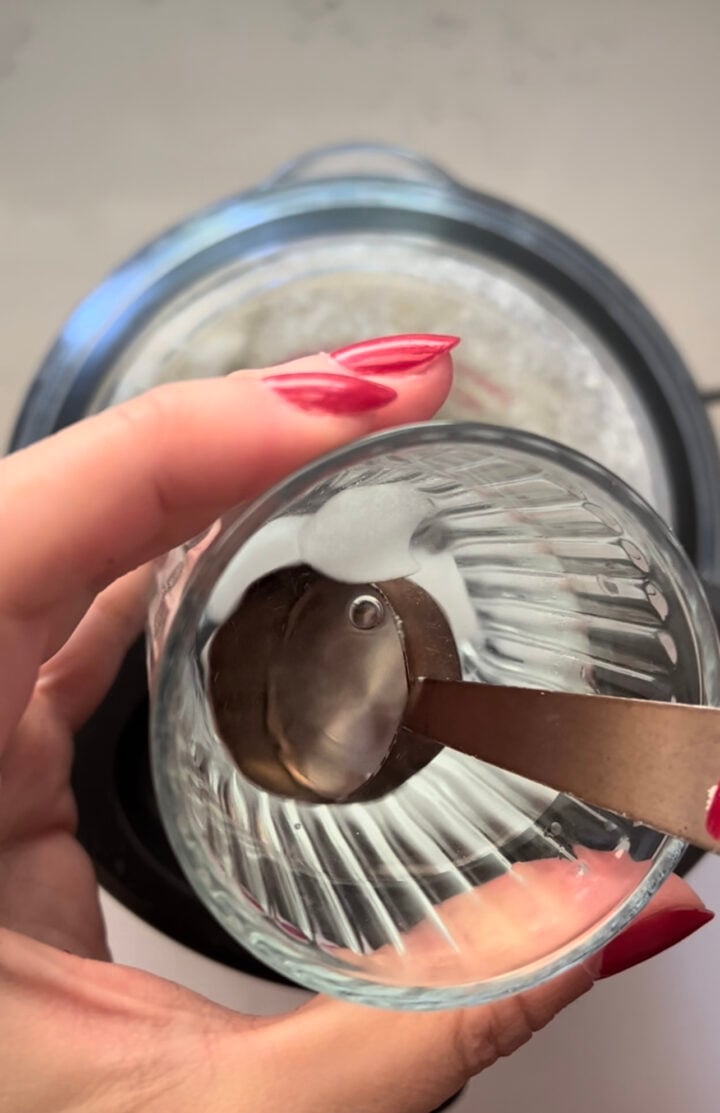
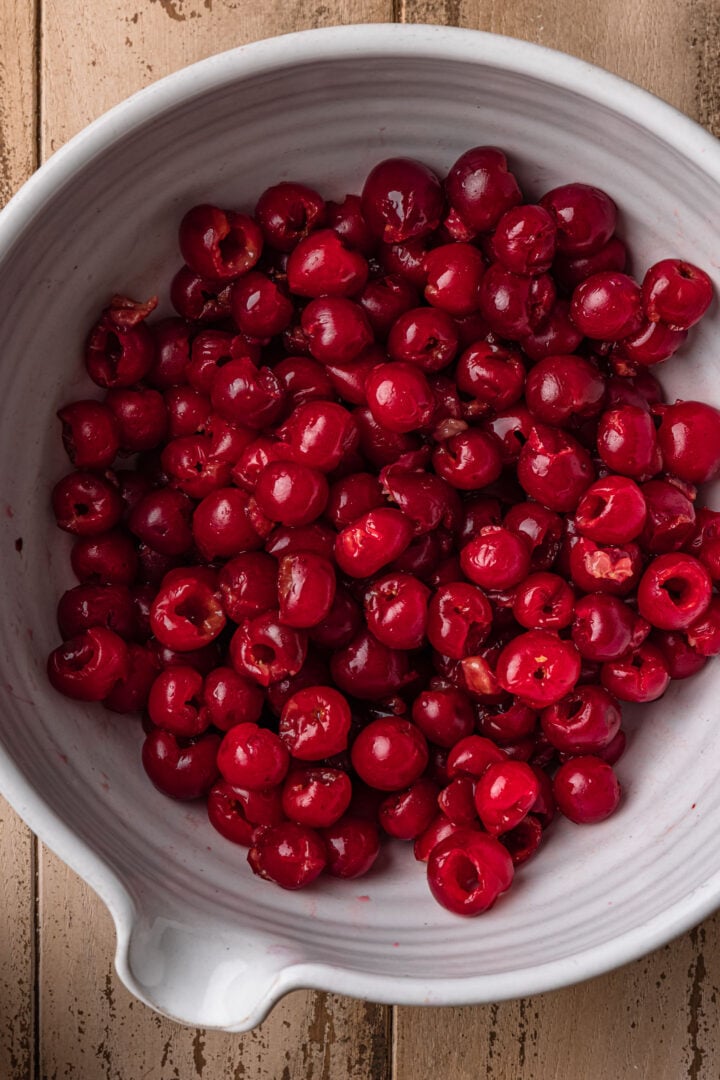
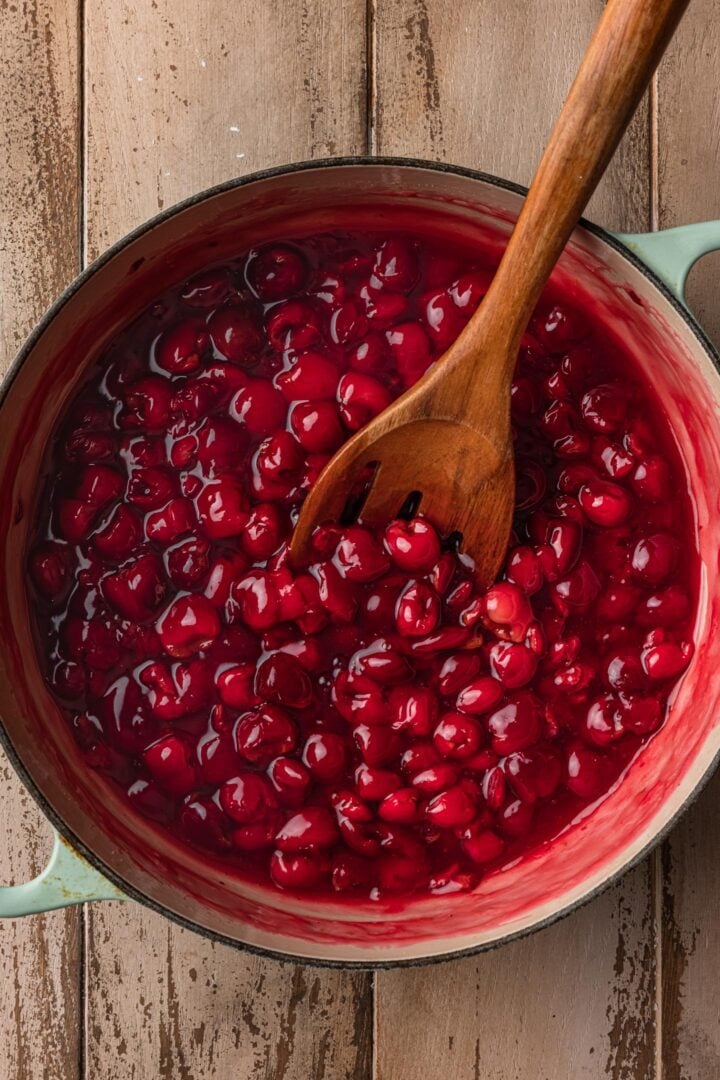
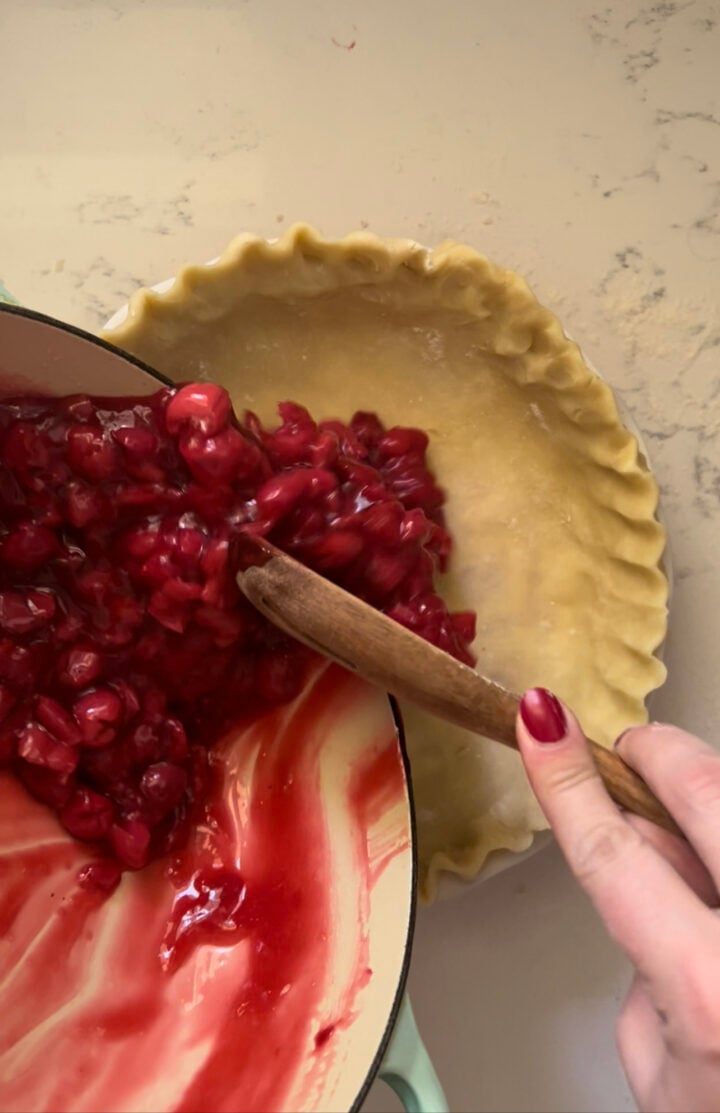
Start by pitting the cherries, if using fresh. I highly recommend using a cherry pitter for that, such as this one (which pits 6 cherries at a time) or this one (which pits each cherry individually).Before cooking the filling, go ahead and massage the pitted cherries just to ensure you haven’t missed any pits! Nothing worse than eating sour cherry pie and biting into an undesired pit.In a small Dutch oven or saucepan, combine the pitted cherries, sugar and lemon juice. Cook, over medium heat, until the cherries have released a considerable amount of juice.Mix the cornstarch with a few tablespoons of water in a bowl. Dissolving in water will make it easier to incorporate into the filling! If you’re worried about watering down the filling, you could take a ladleful of the released juices and dissolve the cornstarch in that.Stir in the dissolved cornstarch and continue cooking until the filling thickens.Remove the filling from the heat and stir in the vanilla and almond extracts. Let the cherry filling cool before assembling the pie.
Step 3: Assemble and bake the sour cherry pie.
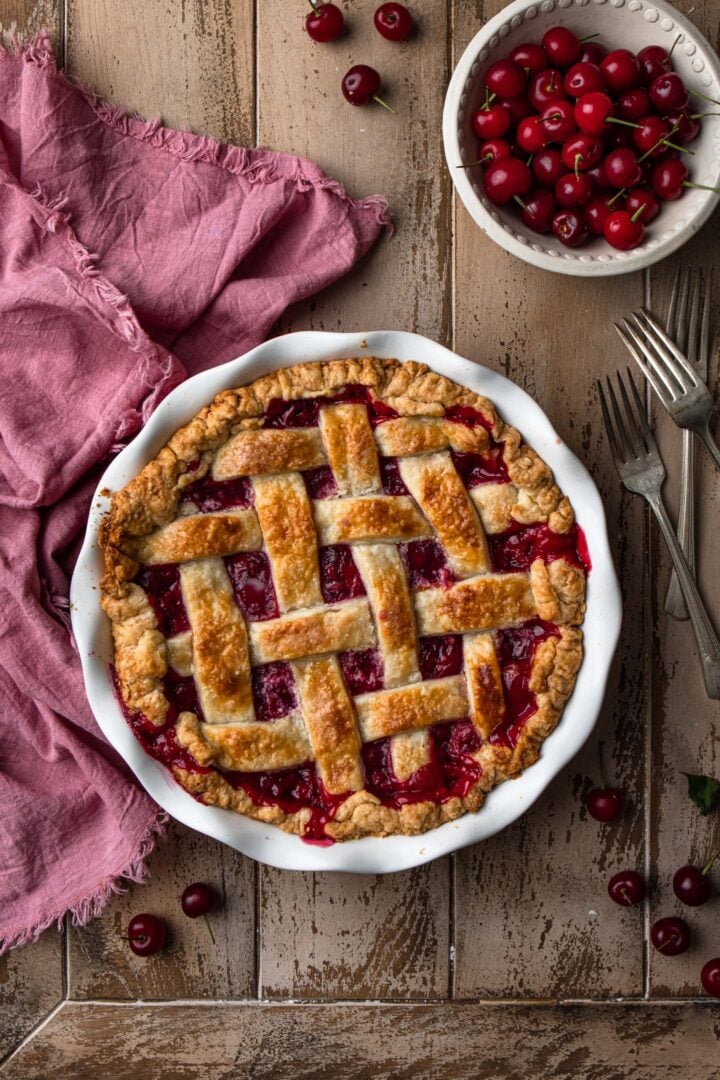
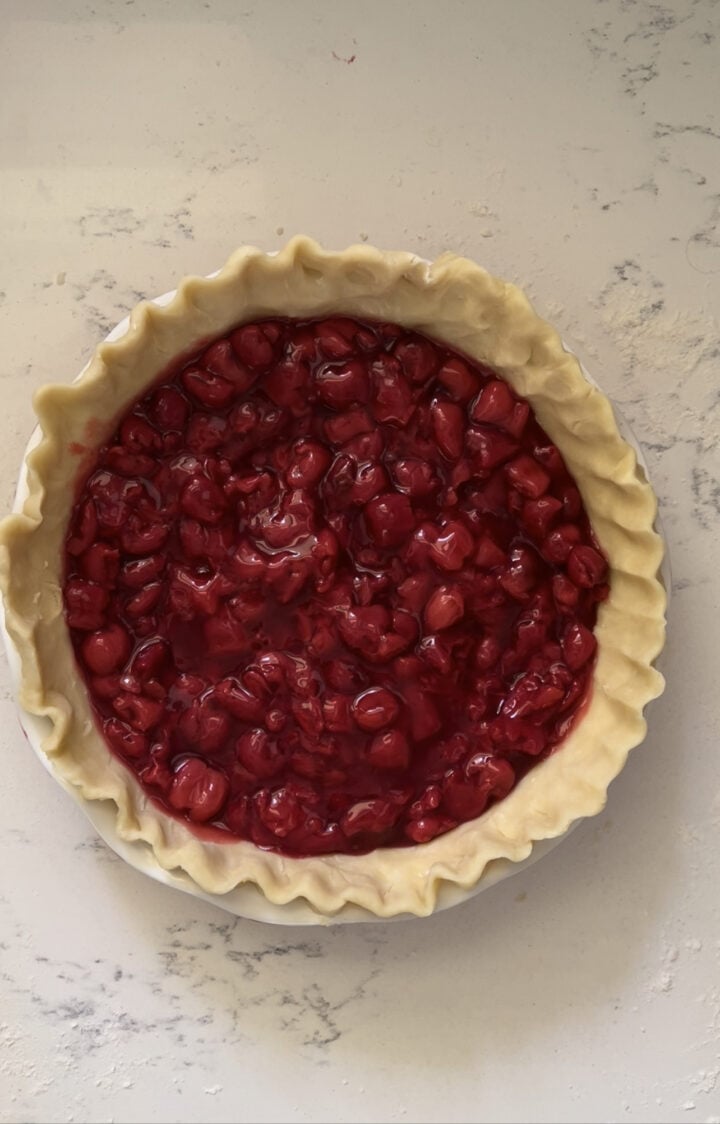
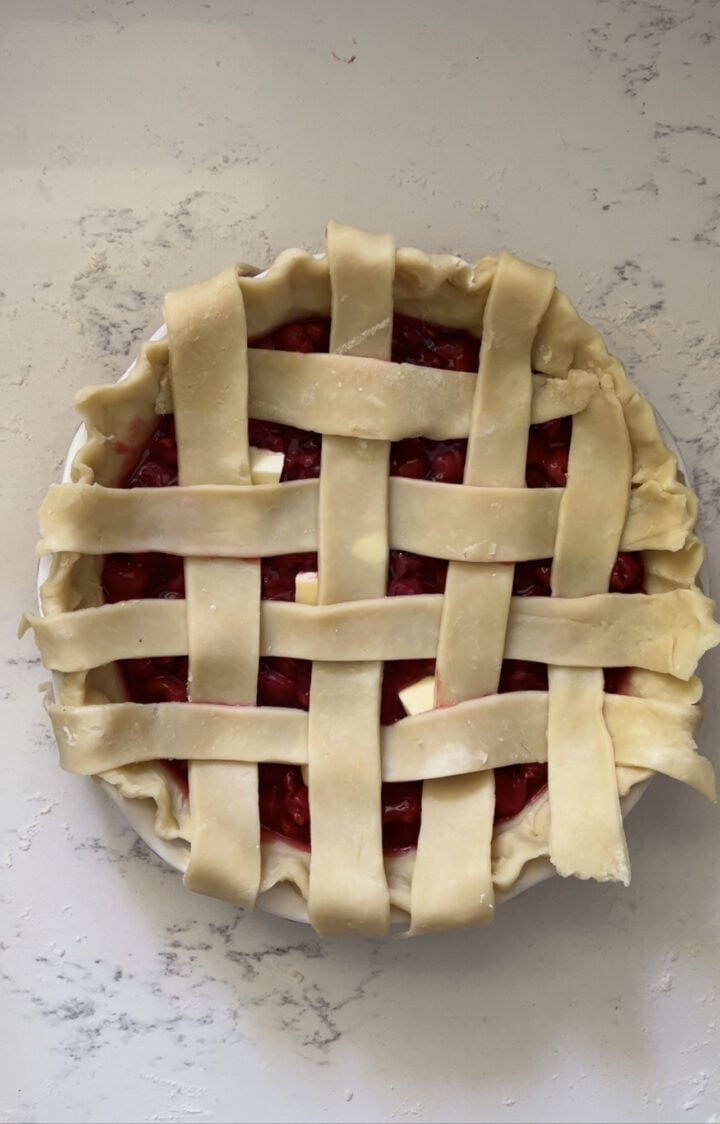
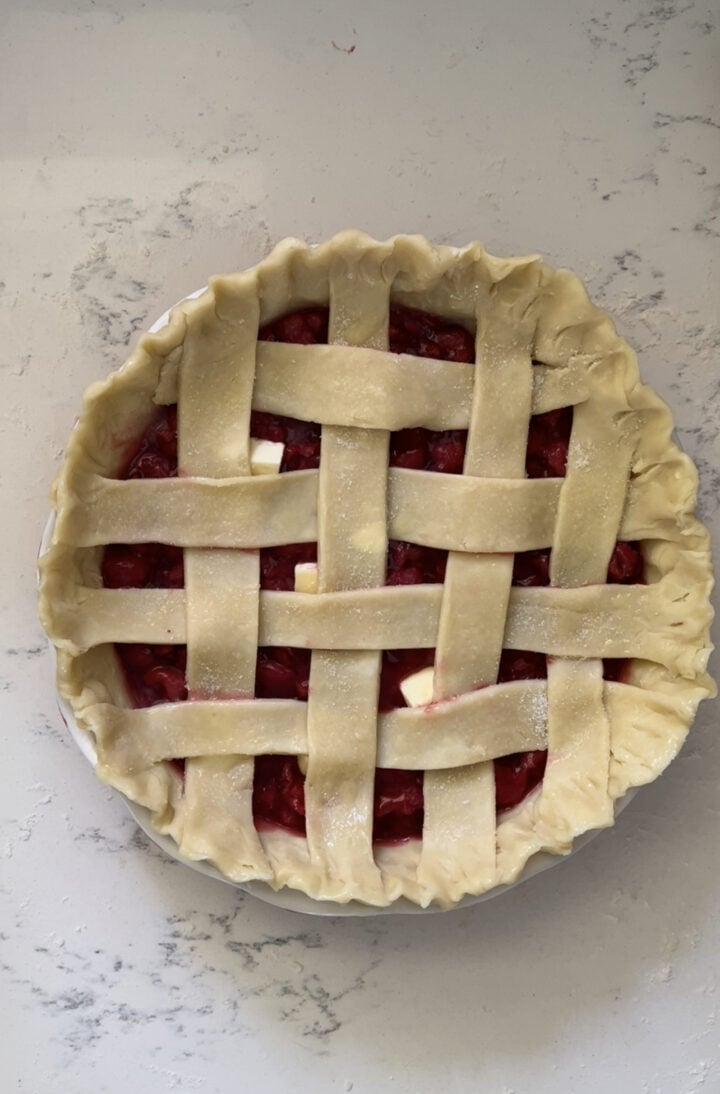
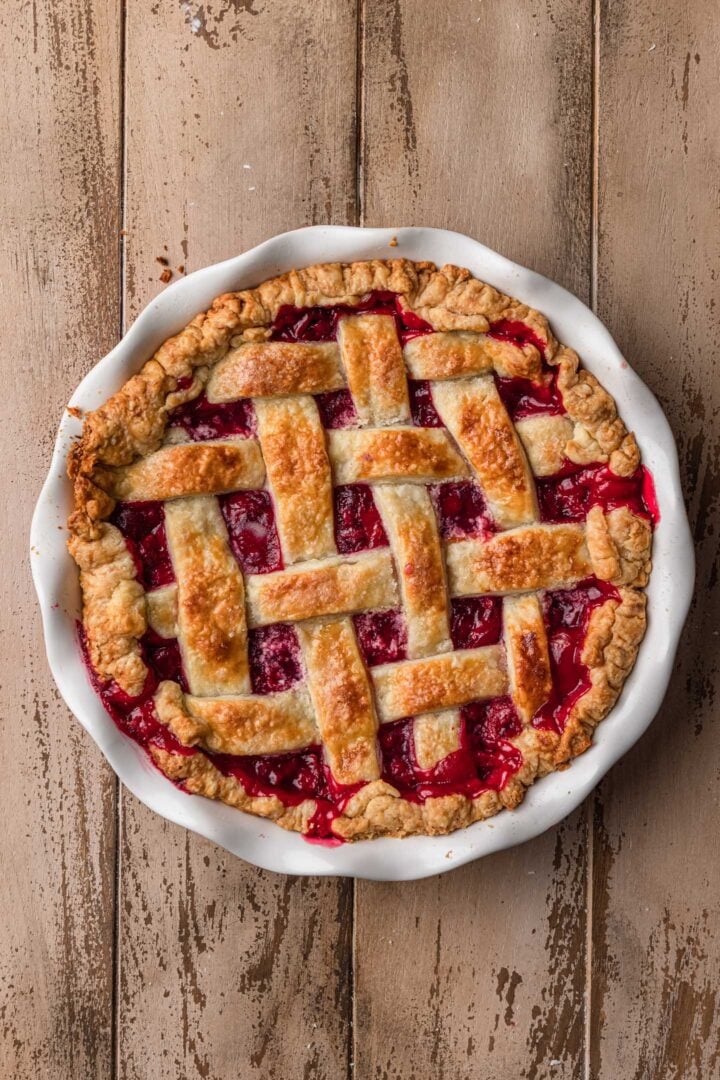
Roll out one of the chilled pie disks on a floured surface until it’s about 12 inches in diameter. Transfer to to a 9-inch pie pan, carefully pressing the dough into the bottom and sides of the pan.Pour the filling into the crust, spreading it evenly with a spatula. Then, dot it with cubes of cold butter. That is not mandatory, but I find that it makes this pie extra rich and delicious!Roll out the second disk to 12-inch round and use a pastry wheel (sharp knife or pizza cutter also work) to cut ten 3/4-inch wide strips. Arrange the strips on top of the filling, forming the lattice. How do I make a lattice? You’ll start by laying out 5 parallel strips, with about 1/2-inch space between them. Then, fold back every other strip and place a strip perpendicularly to the parallel strips you have already laid. Unfold the folded strips over the strip you just placed, then fold back the strips that are underneath the strips you just folded. Lay another perpendicular strip, then unfold the folded strips. Repeat, carefully threading strips over and under, until the lattice is completed. Press the edges of the strips into the bottom crust edges to seal.Flute or crimp edges of crust.Brush the lattice crust with egg wash, then sprinkle with sugar.Bake at 425ºF for 15 minutes, then reduce temperature to 375º and continue baking until the crust is golden brown and the filling is bubbly, about 45 – 60 minutes longer. If you notice that the crust is browning too quickly, cover with foil or with a pie crust shield.Remove pie from oven and let it cool before serving.
Serving Suggestions
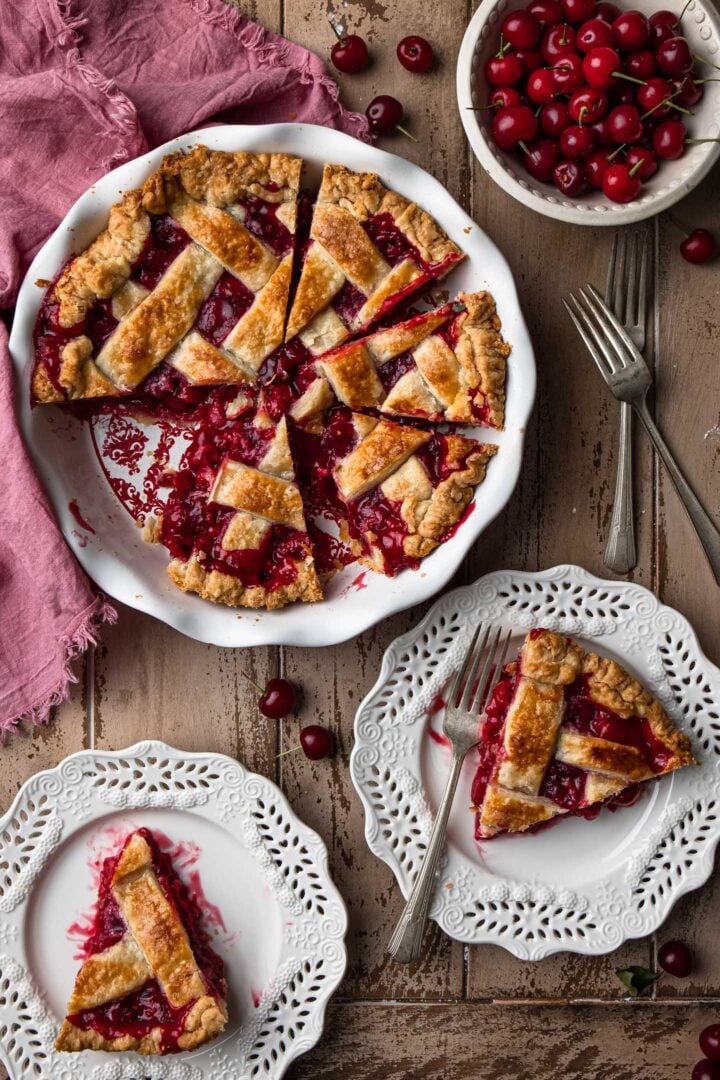
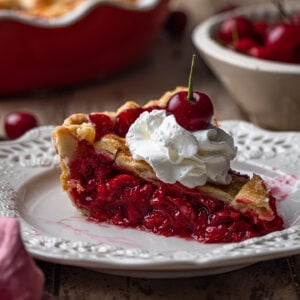
Cherry pie is usually served warm or at room temperature. It goes great with some whipped cream or, a la mode, with a scoop of vanilla ice cream!If you’ve baked your pie ahead and need to reheat it to serve warm, I recommend doing it in the oven, at 250ºF if the pie is at room temperature or 350ºF is the pie is cold. Just leave your pie in the oven for 15-20 minutes if reheating slices, or up to 30 minutes for a whole pie.
Sour Cherry Pie Variations
While a classic cherry pie is a showstopper in itself, it is always fun to change things up a bit! Here are a few suggestions:
Use sweet cherries if you can’t find sour cherries. In that case, decrease the amount of sugar to 2/3 cups and increase the lemon juice to 1 tablespoon. You can also make this pie with rainier cherries or black cherries.Make a crumb topping, or streusel, instead of a lattice crust. Just mix 1 cup of brown sugar with 1 cup flour, then add 1/4 cup butter and work into the sugar/flour mixture with a fork until incorporated and crumbly. Top the pie with this mixture before baking!Make a black forest cherry pie by using a chocolate pie crust and/or by adding a layer of chocolate ganache underneath the cherry pie filling. Here’s a fun recipe!Substitute some of the cherries with your favorite berries, such as blueberries or blackberries, for a mixed berry/cherry pie!
Storage and Freezing Instructions
According to the USDA, fruit pies are safe to be left (covered!) at room temperature for up to two days, due to their high sugar and acid content, which retard bacteria growth. However, if you prefer you can store it in the fridge, where it will keep well – covered loosely with plastic wrap or foil – for up to 5 days! Sour cherry pie can also be frozen for up to 3-4 months! Just let it cool completely, then wrap tightly with foil or plastic wrap and place in a freezer bag. Once ready to serve, thaw overnight in the fridge and reheat in the oven – at 350ºF – until warm, about 30 minutes. I recommend shielding the crust to prevent it from getting too brown.
More Fruity Summer Recipes
Passion Fruit MousseStrawberry MilkshakeBerry TiramisuAmerican Flag CakeStrawberry Tartlets